


PrestaShop CMS entered a market in 2008 and quickly gained striking popularity. Just in 2 years after the launch, the system managed to win a prestigious Best Open-source Business Application award. Currently it has over 4 million downloads. Hence, taking into account the popularity of PrestaShop, we just had to write a manual for content managers.
In this article, you will learn how to properly create and edit products and categories. The information will be comprehensible and useful to both a newbie and a professional. So that’s the end of the introduction. Let’s start!
Contents
Creating a category in PrestaShop
- Sign in to the admin panel
- Dashboard
- Categories in PrestaShop
- Category creation page
- Name and parent category
- Description and image
- Metadata
- Friendly URL and access
- Other language versions
- Saving a category in PrestaShop
Creating a product in PrestaShop
- Authorization
- Admin panel
- Products in PrestaShop
- Product creation page
- Basic settings
- Quantities tab
- Shipping tab
- Pricing tab
- SEO tab
- Options tab
- Saving a product
Editing a category in PrestaShop
Editing a product in PrestaShop
Creating a Category in PrestaShop
1. Sign in to the Admin Panel
In PrestaShop, the admin panel is called the dashboard. To sign in to the system, you need to enter your login and password on the sign-in page. To go to the authorization page, add /admin after the URL of your website, for instance, http://example.com/admin. If needed, you can check the Stay logged in box to speed up future authorizations. In case you have forgotten your password, just follow the corresponding link.

2. Dashboard
The first page you see in case the authorization was successful is called “Dashboard”. On this page, you can view all main data about your store sorted by different periods of time. For example, sales, orders, conversion etc. Also, from here you can go to new category creation. To do this, in the side menu, select Catalog -> Categories.


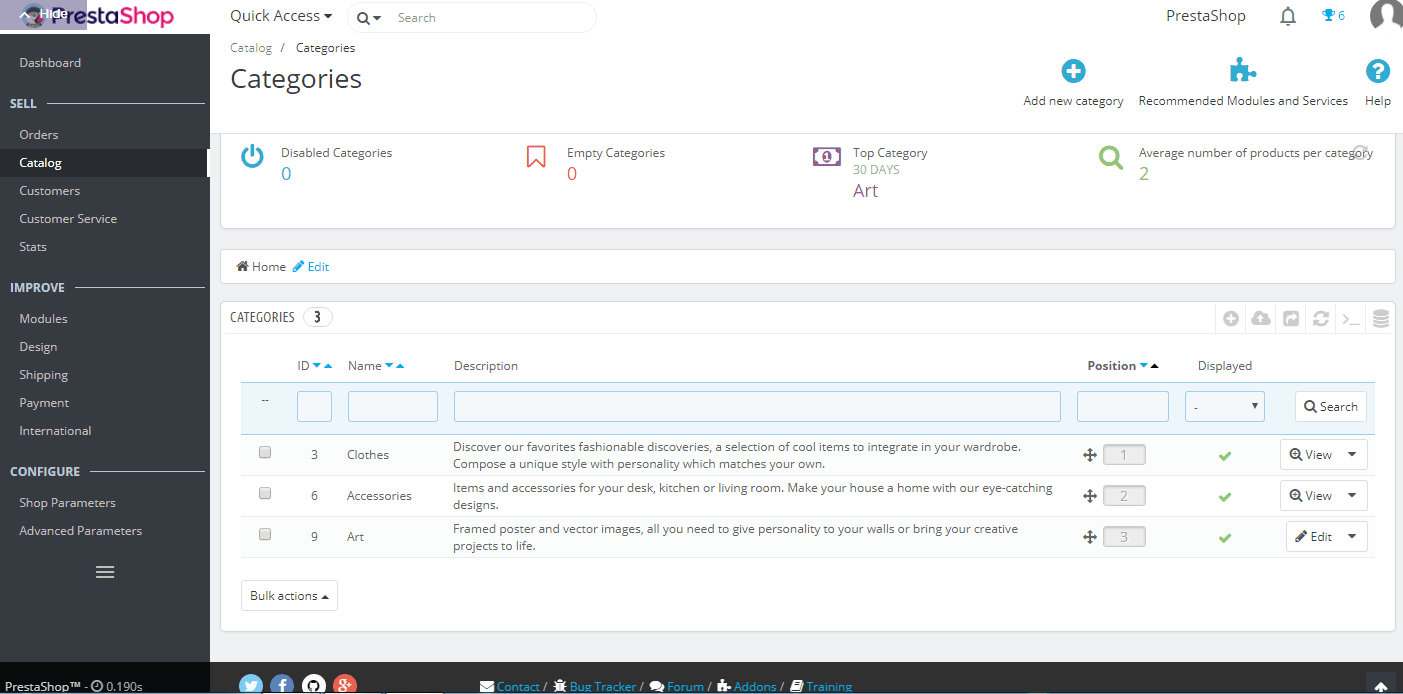
3. Categories in PrestaShop
On this page, you can view existing categories or create a new one. To start the creation process, click the Add new category button.
4. Category creation page
Here we will take a look at the category creation page in PrestaShop. Step by step, filling out the fields in this section you will add all the necessary information to your the page of your category.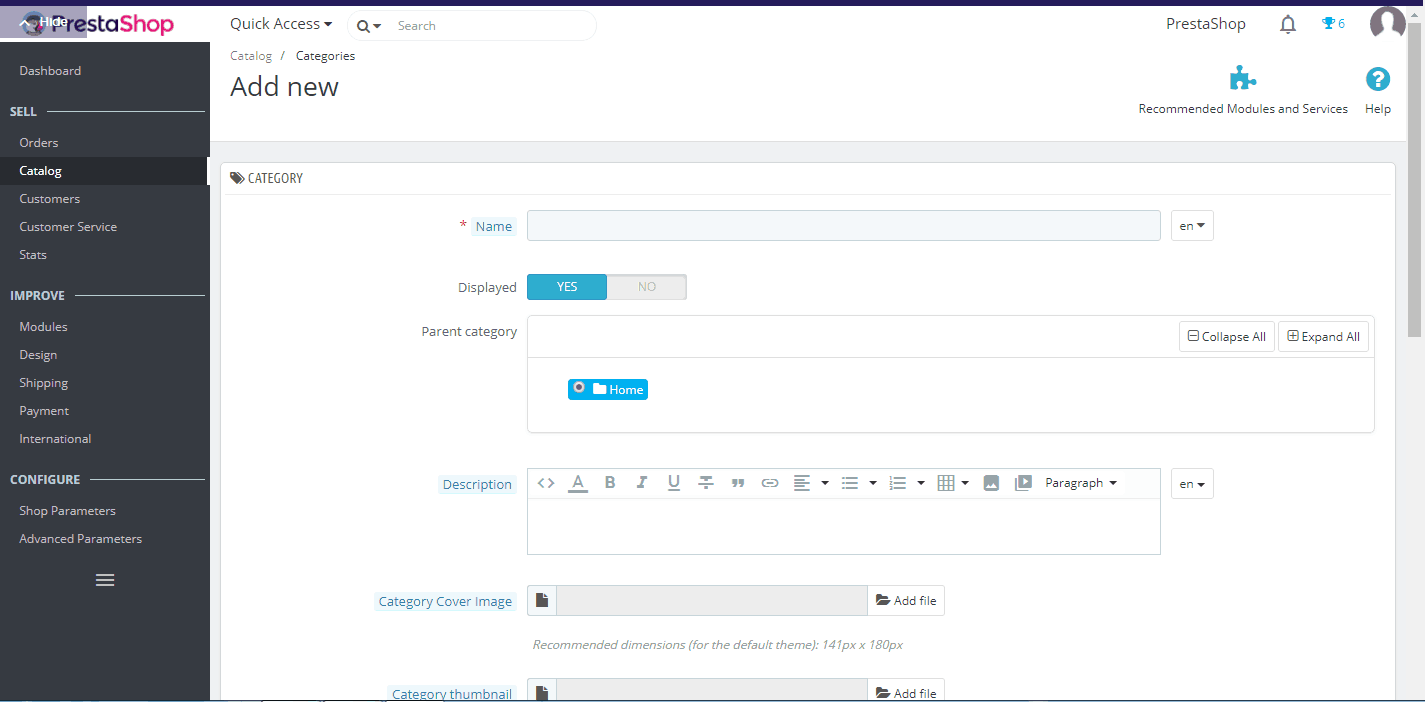
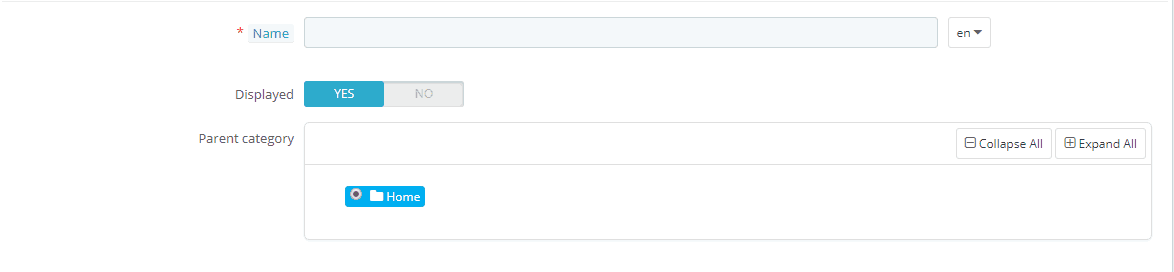
5. Name and Parent Category
In the Name field, indicate the name of the category. In Parent category, choose a category to which this sub-category will belong. By default settings, this is a home page. Also, use the Displayed switch to choose whether the category will be shown.
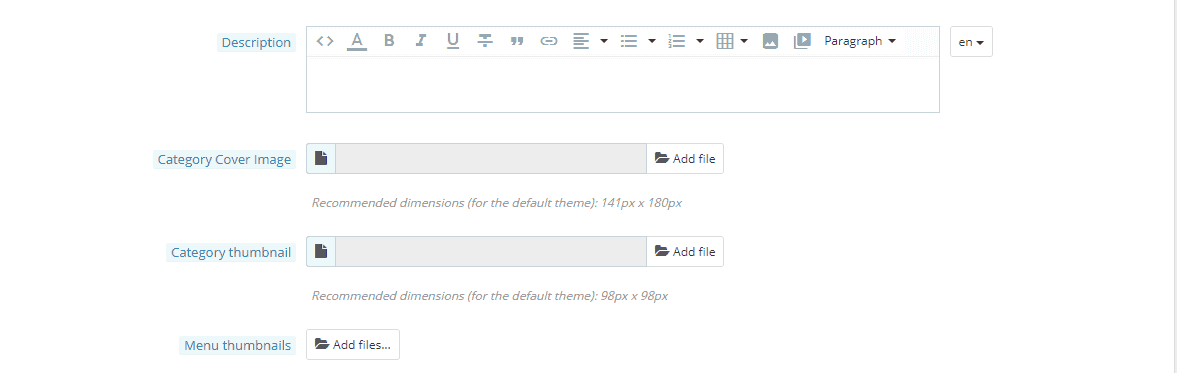
6. Description and Image
Now you will edit the Description field that includes the main text of the category. In addition to the text, here you can insert images, tables, and videos. After that, you go to the image selection step. Under the description, you can choose a category cover image, a category thumbnail, and menu thumbnails. To do this, select the corresponding option, click Add file and choose the necessary image from your computer.
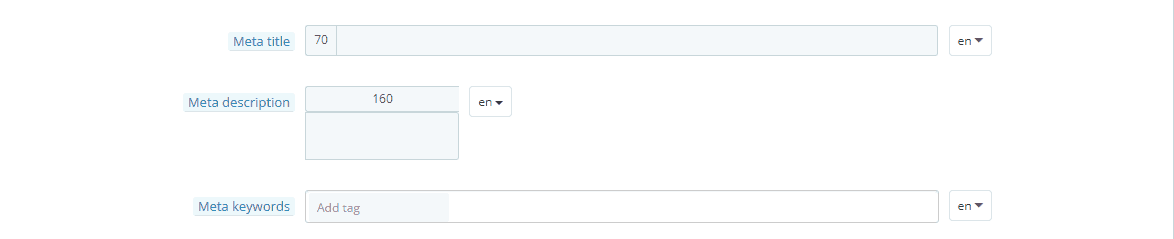
7. Metadata
During this step, you will fill out metadata in PrestaShop. The first field is Meta title. Here you enter the title of the future category. After that, there is the Meta description field which includes the description of the category. Its content is copied to the Description tag. And Meta keywords are tags that will be shown in the category.
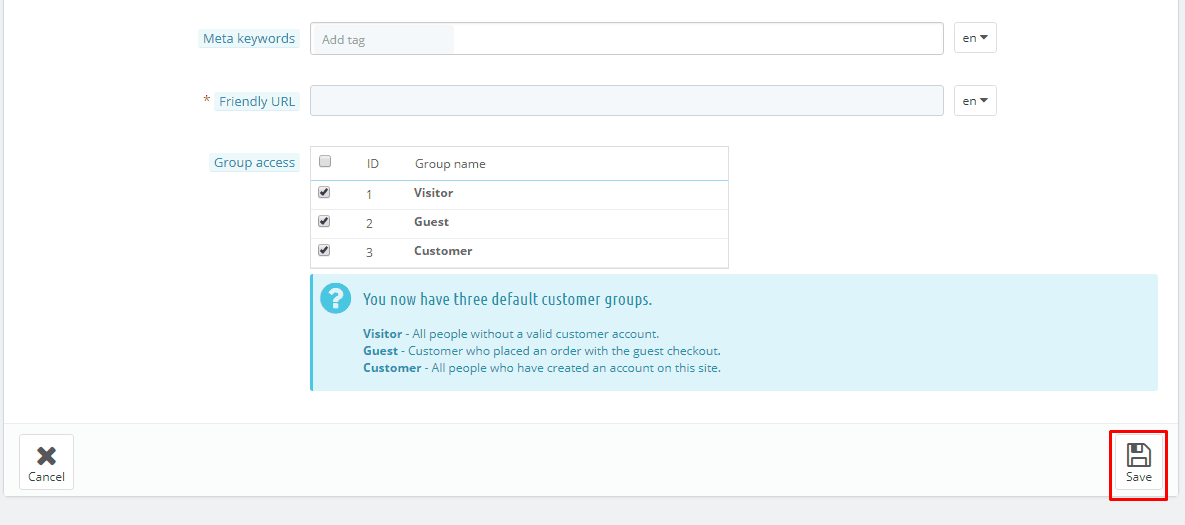
8. Friendly URL and Access
In the Friendly URL field, enter the URL that will forward to the category. You can indicate the URL manually or it will be automatically created based on the data in the Name field.

9. Other Language Versions
After you finish all the previous steps, if needed, you can fill out another language version. Near every option (where possible) there is a dropdown list with language selection. Hence, just repeat all the steps mentioned above for each language version.


10. Saving a Category in PrestaShop
After you are done will all necessary language versions scroll down to the bottom of the page and click the Save button. That’s all, you have successfully created a category in PrestaShop.
Creating a Product in PrestaShop
1. Authorization
First, you have to sign in to the system. To do this, add /admin after your domain name (for instance, http://example.com/admin). Then enter the correct login/password combination and click Log in.
2. Admin Panel
After you have successfully signed in, you get to the admin panel. Here go to the Catalog menu -> Products and move to the following step.

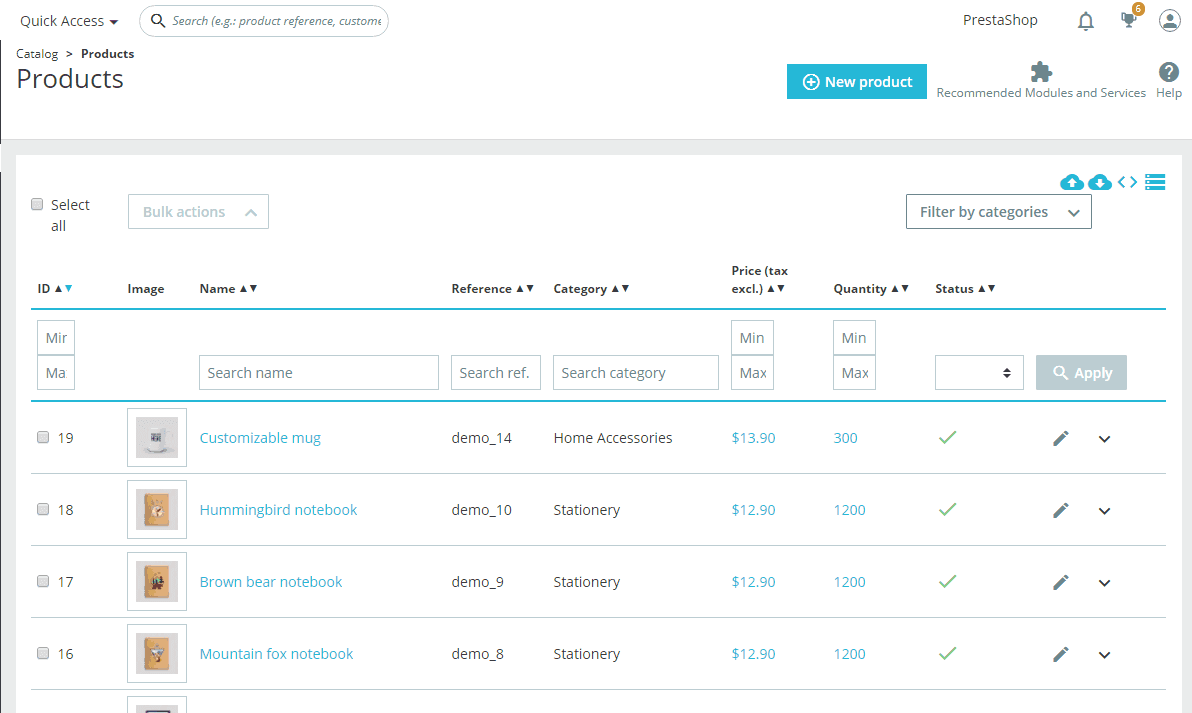
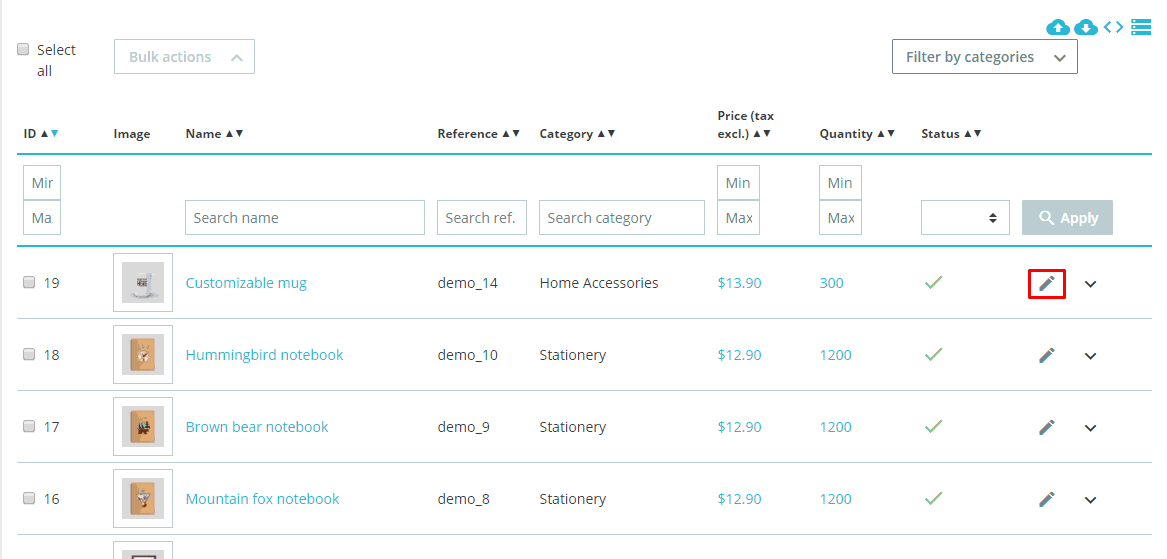
3. Products in PrestaShop
On the Products page, you can see the list of existing products, their images, references, categories, price, quantity, and status. Also, here you can edit a product or add a new one. To do this, click the New product button.
4. Product Creation Page
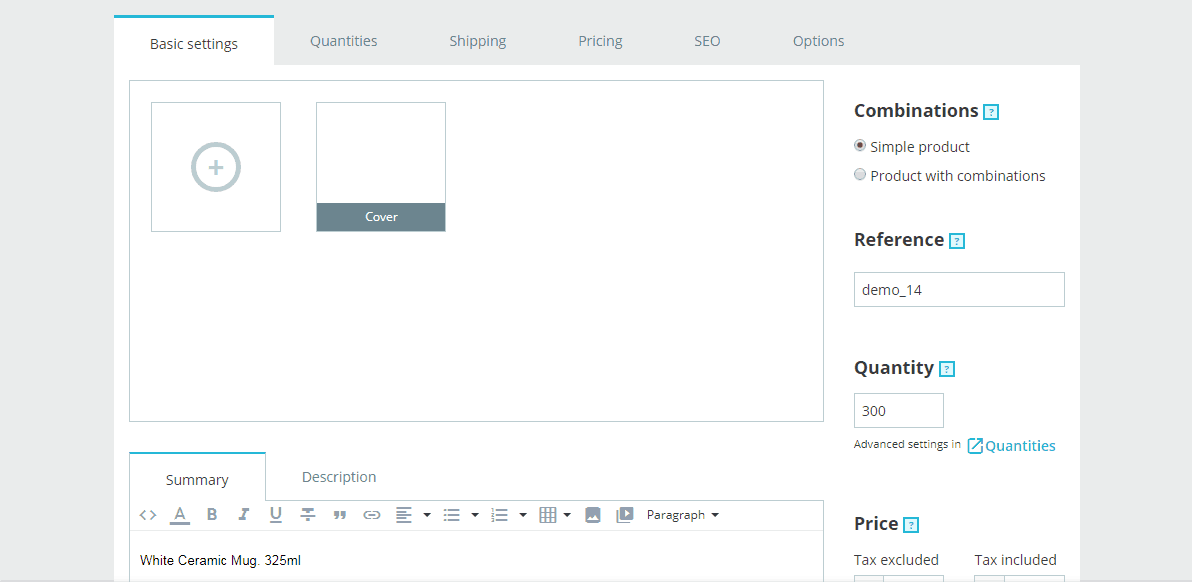
On this page, you fill out all the data needed to create a new product. There are several tabs: Basic settings, Quantities, Shipping, Pricing, SEO, Options. You start with the Basic settings page.
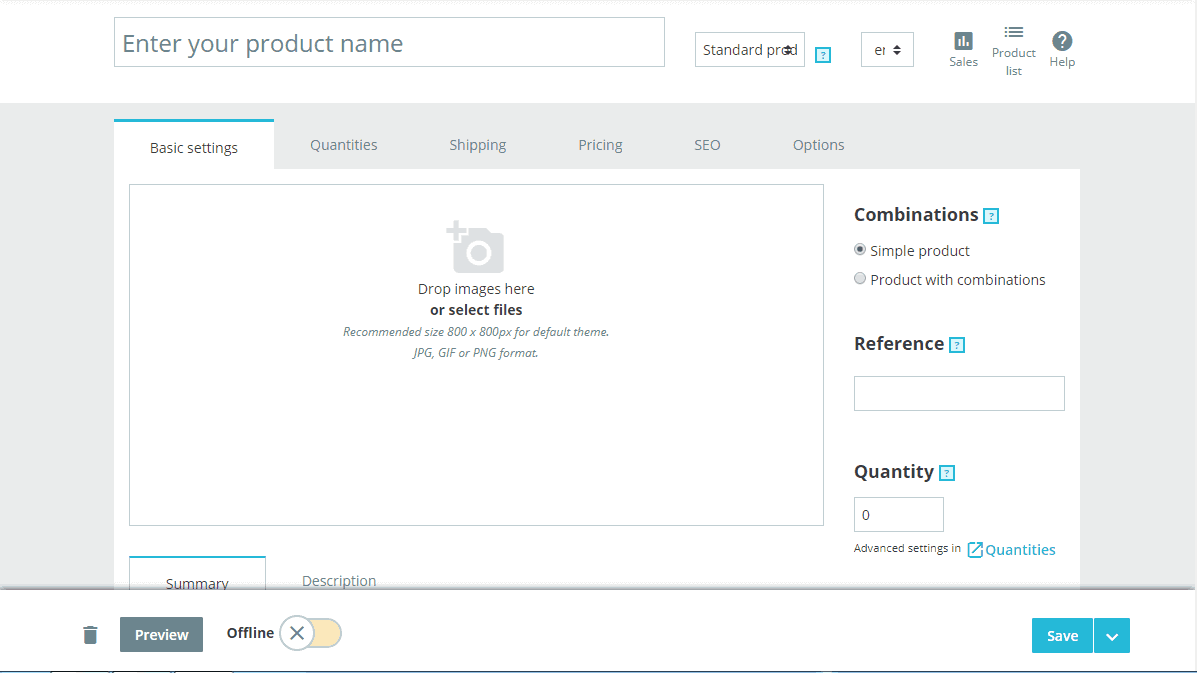
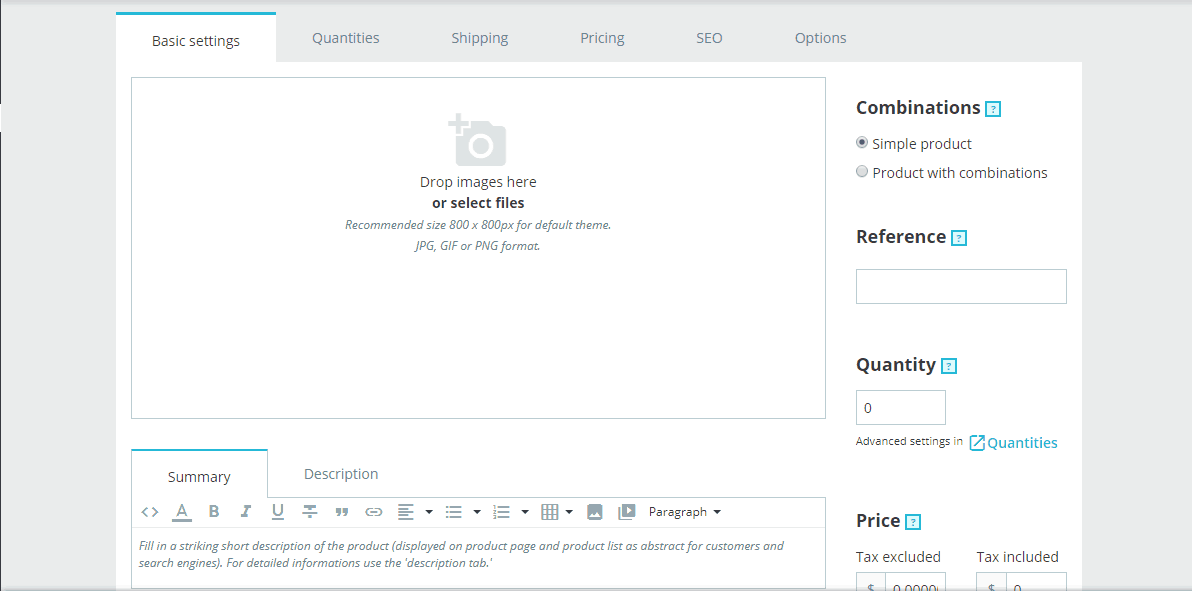
5. Basic Settings
In this section, you can set a product image as well as enter the summary and description of the product. Here you add different features of the product, its price, reference, quantity, and categories. Also, you can create a product with combinations. An additional interesting option is the Create a new category button that allows quick category creation.

6. Quantities Tab
On this tab, you should enter all the necessary information about the quantity of the product. In the Minimum quantity for sale field, you can indicate a limit that will prevent customers from buying, for example, less than 3 units of the product. Also, there is an option to inform a certain employee when the product is running low and reaches a certain level. In addition, here you enter a response customers will get when they order a product which is out of stock.

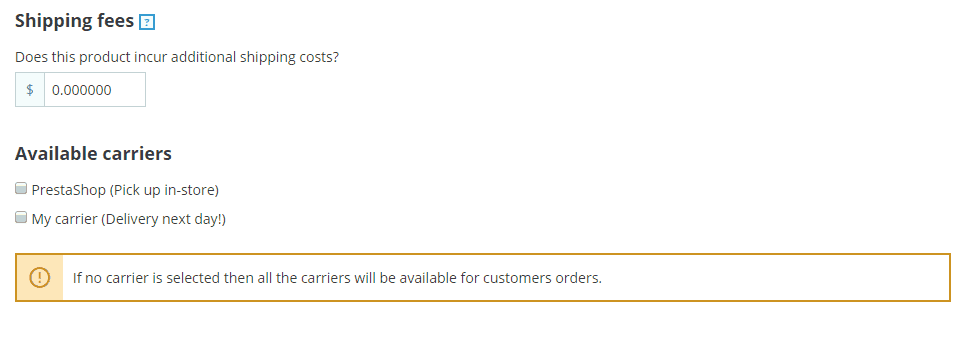
7. Shipping Tab
Now we will take a look at the main options of the Shipping tab. Here you can set package dimension, delivery time, shipping fees, and available carriers.

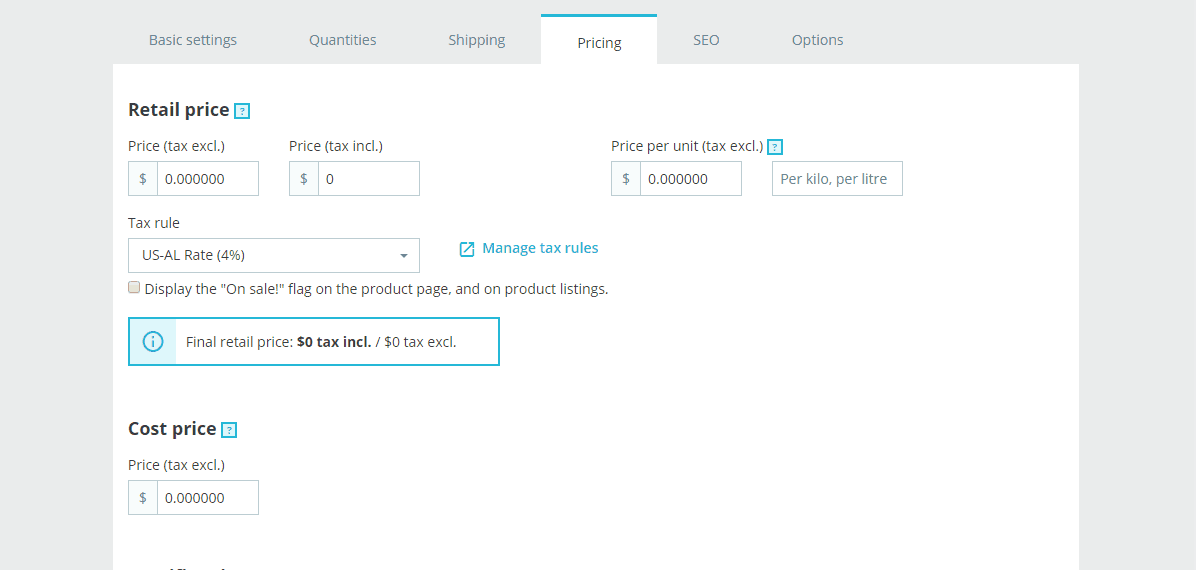
8. Pricing Tab
On this tab, you set the price of the product and everything price-related. PrestaShop offers an opportunity to set a price including and excluding a tax as well as indicate a cost price which can simplify profit calculation. The Priority management field is an additional function, which you can use to set a price for those customers who belong to several groups at the same time.

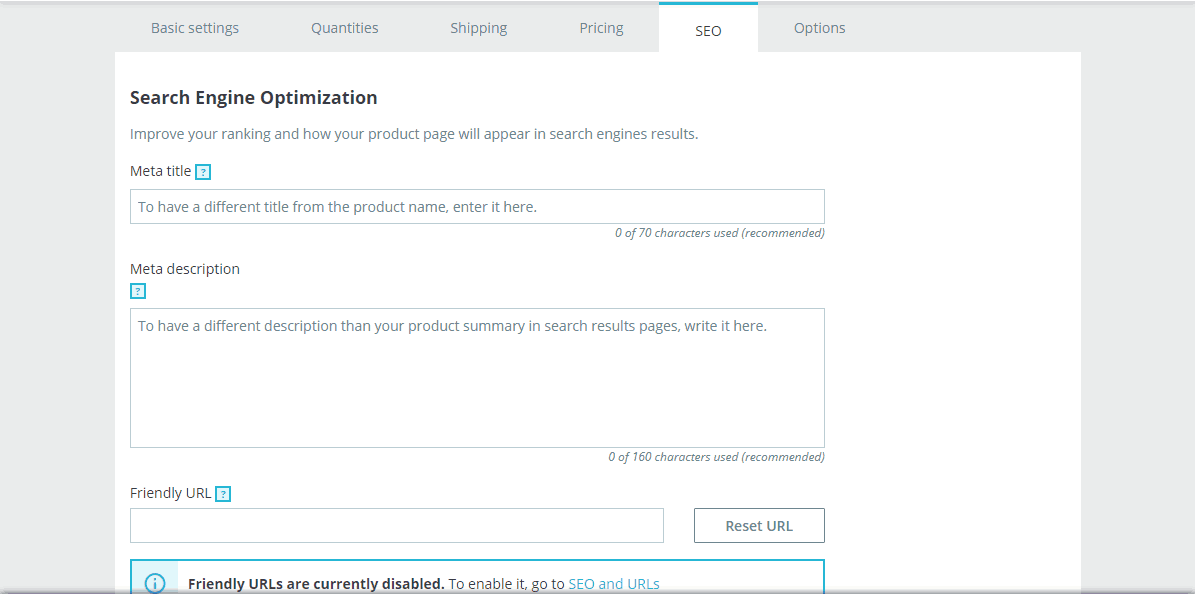
9. SEO Tab
After you fill out all the necessary information on the Price tab, go to search optimization of the product. Enter a Meta Title, a Meta description, and a Friendly URL in the corresponding fields. Also, you can set a redirect to another product or an error page.

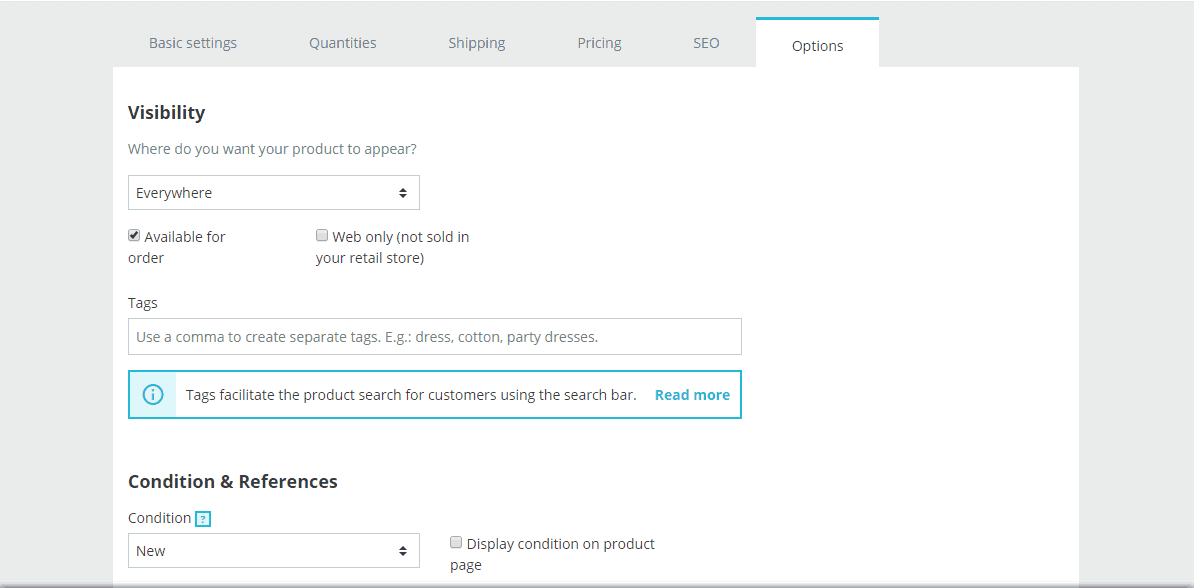
10. Options Tab
On the Options tab, you can indicate visibility, tags, and condition (new, used, refurbished) of the product as well as different barcodes. Additionally, PrestaShop allows you to set user customization of the product (customers can add some information about the product) and add attached files.

11. Saving a Product
After you complete all the steps mentioned above, you need to repeat them for other language versions. Then you can click the Preview button to see how the product will look like. If you are satisfied with the result, click Save. Congratulations, the product in PrestaShop is created.


Editing a Category in PrestaShop
1. Start of Editing
To start editing a category, first, repeat steps 1-3 from the Creating a Category section. After you go to the page with categories, click the Edit link next to the name of the category you need.

2. Category Editing
Once you are on the editing page of a certain category, just follow the steps from the Creating a Category section of this manual to change the appropriate information.

Editing a Product in PrestaShop
1. Start of Editing
To edit the information about a product, you need to sign in to the system and go to the Products page (to do this, follow the steps 1-3 from the Creating a Product section of this manual). Once you are on the Products page, choose the one you want to edit.
2. Product Editing
To edit a product, you just need to follow the steps from the Creating a product section and change the necessary fields. Adhere to the manual and you will easily deal with this task.
Conclusion
Here is the end of another manual on adding content. This time we have clarified the main stages of creating and editing products or categories in PrestaShop. With the help of this manual, you will be able to perform the majority of typical tasks with minimum effort and maximum efficiency. There is no need to learn the article by heart, as you can always check the necessary section later using the navigation.
We hope we have answered key questions about the work in PrestaShop. In addition, you can watch a video tutorial that will clearly demonstrate everything. Subscribe to our email newsletter, as there are many exciting things waiting ahead.
 (1 rating, average: 5.00 of 5)
 15 Best Hotjar Alternatives & Competitors
 13 Best SEO Checkers
 15 Best Website Heatmap Tools
 Hotjar vs. Lucky Orange: What’s Best for 2023
 Hotjar vs. Fullstory: Comparison 2023
 Best 25 Starbucks Drinks
 What's The Difference Between Empathy and Sympathy?
 What's the Difference Between Affect and Effect?